How to Print on Tote Bags at Home
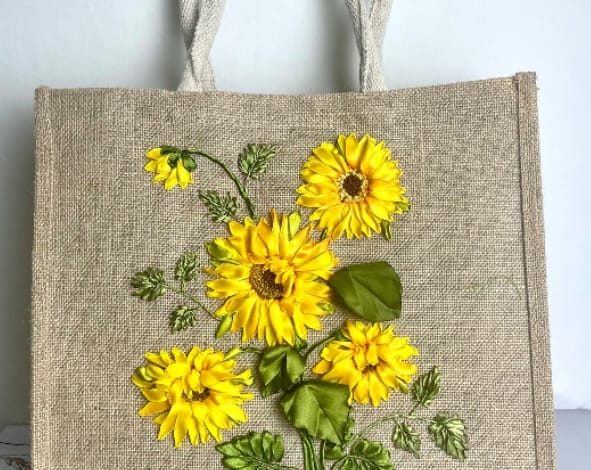
Tote bags have become a popular accessory for carrying everything from groceries to gym gear. Not only are they practical, but they also offer a fantastic canvas for personal expression. If you’re looking to create custom designs on tote bags at home, you’ve come to the right place! In this guide, we’ll explore how to print on custom burlap tote bags and custom boat tote bags, using various techniques that make the process fun and accessible.
Why Choose Custom Tote Bags?
Custom tote bags are versatile and eco-friendly alternatives to plastic bags. Whether you want to promote your business, celebrate a special occasion, or simply showcase your creativity, printing on tote bags allows you to create something unique. Plus, with options like custom burlap tote bags or custom boat tote bags, you can choose materials that suit your style and purpose.
Materials You’ll Need
Before we dive into the printing process, let’s gather the necessary materials:
- Tote Bags: Choose your preferred style. Burlap totes offer a rustic charm, while boat totes provide a classic, nautical look.
- Ink or Paint: Fabric ink or paint is ideal for long-lasting designs. If using paint, make sure it’s suitable for fabric.
- Stencil or Design: Create your own design or use a pre-made stencil. If you’re designing digitally, programs like Adobe Illustrator or Canva can help you create stunning visuals.
- Sponge or Brush: Use a sponge for an even application of ink or paint.
- Cardboard: Place a piece of cardboard inside the tote bag to prevent the ink from bleeding through.
- Iron (optional): For setting the ink or paint, you may need to heat set your design, depending on the materials used.
Step-by-Step Guide to Printing on Tote Bags
Step 1: Prepare Your Design
Start by sketching or printing your design on paper. If you’re using a digital design, ensure it’s the right size for your tote bag. You can use a stencil to trace the design directly onto the fabric or create a transfer design using transfer paper.
Step 2: Set Up Your Work Area
Find a clean, flat surface to work on. Lay down some old newspapers or a plastic sheet to protect your workspace from spills and splatters. Place your tote bag flat, ensuring it’s free from wrinkles.
Step 3: Position the Cardboard
Insert a piece of cardboard inside the tote bag. This will help keep the fabric taut and prevent the ink from seeping through to the other side.
Step 4: Apply Your Design
- Using Stencils: If you’re using a stencil, secure it to the tote bag with masking tape. Use a sponge or brush to apply the fabric ink or paint. Be careful to avoid excess ink, which can lead to smudging.
- Freehand Painting: If you prefer a freehand approach, use a brush to carefully paint your design directly onto the tote bag. This technique allows for more creativity, but requires a steady hand.
Step 5: Let It Dry
After applying the design, let it dry completely. Follow the instructions on the ink or paint for drying times, as this can vary. Ensure the bag is placed in a well-ventilated area to speed up the drying process.
Step 6: Heat Set the Design (if necessary)
To ensure your design is long-lasting, you may need to heat set it. Place a piece of parchment paper over the design and use an iron on a low setting for a few seconds. This helps bond the ink to the fabric, making it more durable during washes.
Tips for Success
- Test First: Before printing on your actual tote bag, practice on a scrap piece of fabric to get the hang of your technique.
- Layering: For more complex designs, consider layering colors. Allow each layer to dry before adding the next for a more professional look.
- Personalization: Consider adding personal touches like names or dates for custom gifts.
Caring for Your Custom Tote Bags
To keep your custom burlap tote bags or custom boat tote bags looking fresh and vibrant, follow these care tips:
- Washing: Hand wash in cold water with mild detergent. Avoid using bleach or fabric softeners, as these can damage the design.
- Drying: Air dry your tote bag instead of using a dryer to prevent shrinkage or fading.
- Storage: Store your tote bags in a cool, dry place, away from direct sunlight, to prevent fading.
Conclusion
Printing on tote bags at home is a rewarding project that allows you to unleash your creativity. Whether you’re making custom burlap tote bags for a rustic-themed event or custom boat tote bags for a beach outing, the process is straightforward and enjoyable. By following the steps outlined above, you can create beautiful, personalized tote bags that reflect your style and serve practical purposes.
So grab your materials and get started on your tote bag project today! With a little creativity and patience, you’ll have custom bags that are not only functional but also a joy to carry around. Happy crafting!


